License
When purchasing a theme from ThemeForest, you have two licensing options: Regular License and Extended License. If your end product, including the item, will be free to the end user, then a Regular License is what you need. An Extended License is required if the end user must pay to use the end product.
The billing, licensing terms, and process are handled by Envato, and we have no control over these aspects. Click here to learn more about what each license is for and which one to purchase.
Note
One license is valid for one domain only. If you want to use the theme on another domain, then you have to purchase another license.
License FAQ
If I need to use the theme on a second site, do I need a second license?
Yes. One theme purchase allows you to use it on one finished site. If you need to use it on a second site, you must purchase a second license.
Can I use the theme on a test site and then move it to a live site when finished?
Yes, you can. You can keep the theme on a test site to build it, then move it to the live site once you’re finished.
Can I keep a test and live sites with one Regular License purchase?
You can keep one test/staging website and one live website with one Regular License. Keep in mind that you must use the same domain.
Do I need a new license to use the theme on a WordPress multisite?
Since the multisite websites are located under one domain, it is allowed to use WordPress Multisite under a Regular License.
Server requirements
To use any of our WordPress themes, we recommend your host supports WordPress 6 or greater, PHP 7.4 or greater version (WordPress is now recommending PHP 7.4, read more), and MySQL 5.7 or greater version. For detailed PHP extension recommendations, see the Hosting Handbook.
We recommend that you contact your web hosting service provider to make sure that your server PHP configuration limits are as follows:
-
max_execution_time 240
-
memory_limit 256M
-
post_max_size 32M
-
upload_max_filesize 32M
If you are running an unmanaged dedicated server or VPS, you should check your php.ini file. Alternatively, you can edit .htaccess file at the root of your website and add the following values:
-
php_value max_execution_time 240
-
php_value memory_limit 256M
-
php_value post_max_size 32M
-
php_value upload_max_filesize 32M
Setting these values will ensure you will not get error messages during the installation.
Theme Installation
Extract the zipped package downloaded from ThemeForest to your computer. In the extracted package you will find glimy.zip which is the WordPress theme file.
Installing the theme can be done two ways. You can upload the theme ZIP file using the built in WordPress theme upload, or copy the files through an FTP client.
1) Using WordPress Theme Upload:
- Login to your WordPress admin.
- Navigate to Appearance > Themes and click on Add New and Upload Theme.
- Select the zipped theme file,
glimy.zip, and click Install Now button.
- After the successful installation, click on Activate or navigate to Appearance > Themes and click on Activate button to activate the newly installed theme.
2) Uploading via FTP:
- Log into your web server with FTP client software.
- Unzip the
glimy.zip file and ONLY use the extracted /glimy theme folder.
- Upload the extracted
glimy theme folder into /wp-content/themes.
- Navigate to the Appearance > Themes tab and activate the theme.
Install the required plugins
After installing the theme, you need to install required plugins. You will see a notice for installing required plugins.
- Click on Begin installing plugins. Or go Appearance > Install Plugins.
- You will see list of plugin need to be installed. Now, check all plugins & select bulk options install and click Apply.
- All plugin will be installed. Now, Click on Return to Required Plugins Installer.
- You need to active plugins. Now, check all plugins & select bulk options Active and click Apply.
- Click on Return to the Dashboard.
Child Theme
If you want to make changes to the theme's files and functions, we recommend installing a child theme. This ensures that your theme customizations stay in place after the theme update. If you are not planning to change the core theme files, you are free to skip this chapter.
Note
Install the child theme before importing the demo data. Otherwise, all of your theme options will be reset.
A child theme is installed the same way you install a parent theme. Locate the glimy-child.zip file in the theme package and upload it via the WordPress admin panel. Alternatively, you can unzip it and upload it via FTP (see main theme installation chapter).
Import Demo content
Our theme includes a simple One-click demo content installation, which allows your site to look exactly as on the theme demo.
- Go to the admin area Appearance > Import Demo Data.
- Now, Click on Import Demo button and then on next step click on Continue & Import.
Accessing the Site Settings panel
Each Elementor option that can be applied across your site is a part of the Site Settings, which are centrally located within the Elementor Editor. By utilizing the Site Settings panel, you can ensure consistent color schemes and typography styles throughout your entire website, enhancing its overall visual appeal.
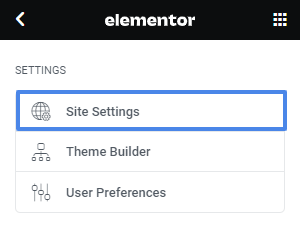
- Edit any page with Elementor.
- Click the hamburger menu icon in the upper left corner of the Elementor Widget Panel.
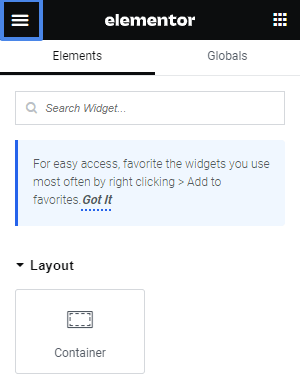
- Select Site Settings from the menu.
Change a global colors:
- Open the Site Settings panel.
- Click Global Colors.
- Go to a font label called Primary (it’s listed under System Colors).
- Click the color swatch to open the Color Picker and select the color you want.
- Click on Update button to save.
Change a global fonts:
- Open the Site Settings panel.
- Click Global Fonts.
- Go to the font labeled Primary (it’s listed under System Fonts).
- Select the Pencil icon.
- Click Update button to save.
Note
Changing Global Fonts and Colors impacts all instances of the selected font and color across your website.
Following Theme Options are located in Appearance > Customize.
1) Logo & Site Identity
- Logo: Select your site’s logo image from the media library
- Title: Enter the name of your site.
- Tagline: Enter a short tagline or description of your site
- Site Icon: Select your site’s favicon image from the media library
2) Homepage Settings
The settings of this group are responsible for selecting the way to display a homepage (front page), as a blog stream or a static one and specifying the pages to be set as a static homepage and as a posts page.
3) General Options
- Preloader: Display preloader while the page is loading.
- Tagline: Display Tagline after logo. (It will only work if the header is being run from the theme file.)
- Magic Cursor: Show Magic Cursor.
- Smooth Scrolling: Enhance user experience with a seamless, smooth scrolling effect.
- Preloader icon: If you want to change the current loading icon, select it here.
4) Blog Options
- Blog Page Title: Enter the blog page home title here.
- Archive Page Layout: Choose between full-width or With Sidebar layout.
- Blog Single Layout: Choose between full-width or With Sidebar layout.
- Social Sharing: Choose the social network you want to display in the social share box into the post single page.
2) Update using WordPress uploader:
-
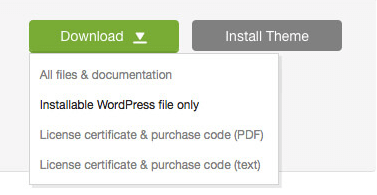
Log into your ThemeForest account and navigate to Downloads tab. Find the theme and download Installable WordPress file only.
-
Log into your WordPress website and go to Appearance > Themes.
-
Activate a default WordPress theme. Delete the older version of your theme and re-upload the new WordPress Installable files that you have downloaded from ThemeForest during the 1st step.
-
Once it is uploaded, activate the theme.
IMPORTANT!
If you're using a child theme, do not activate the newly uploaded parent theme.
2) Update via FTP:
-
Log into your ThemeForest account and get the last version of the theme as described above.
-
Connect to your server using desktop client software (we recommend Filezilla and CyberDuck).
-
Go to
/wp-content/themes directory
-
Remove/rename existing folder with old theme files.
-
Unpack theme installable files downloaded from ThemeForest and upload them to the themes folder.